One of my goals as a freelance writer is to increase my monthly revenue and start building a sustainable income so I can get paid to write articles online.
I’ve accomplished a lot since I started. My rates have gone way up. I’m getting better clients. And I’m always thinking creatively about maximizing profits.
One day I submitted an article to a client, who let me know it would run as soon as his designer finished creating an accompanying image. That got me thinking: Couldn’t I provide comprehensive services, with an article and a custom image, for a higher rate? It would save the client time and money and increase my rate – benefiting both of us.
There was just one problem: I don’t know much about graphic design and have zero access to the industry-standard – but expensive – software programs Photoshop and InDesign.
Here’s how I got past that obstacle and learned how to earn more by creating blog-ready graphics:
How did I do it?
I found Canva, an online tool for creating graphics. You can sign up for a free account and access thousands of free elements to create web-ready images for blog posts, social media sites, and even your own website.
There are additional stock photos, templates, and icons you can use for $1 each. This is a significant savings; just purchasing one stock photo can easily run from $10-30 on other sites, so $1 is a bargain.
Most important, using Canva is extremely easy and intuitive. If you don’t have an eye for design, it has beautiful, ready-built images you can customize. If you want to be more creative, you can build unique images tailored to your clients’ needs. (This post is not sponsored by Canva. I’m a real Canva user.)
How does Canva work?
Canva is very user-friendly and you can build visually appealing images in minutes. Once you log-in, you can begin to create your graphic.
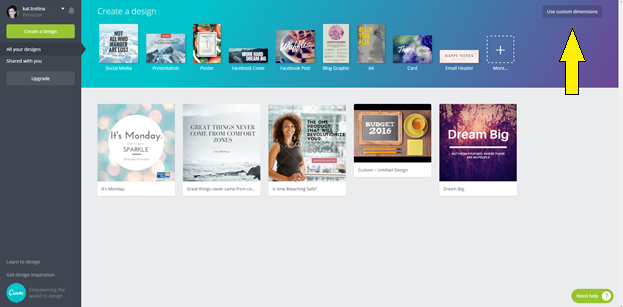
Choose your graphic size: At the top in the blue bar, you’ll see designated uses, such as a Facebook cover or blog graphic. These are pre-sized to fit each platform appropriately. If you’re designing an image for a blog, there is a pre-sized option for that, or you can create your own using the “Use Custom Dimensions” button at the top right.
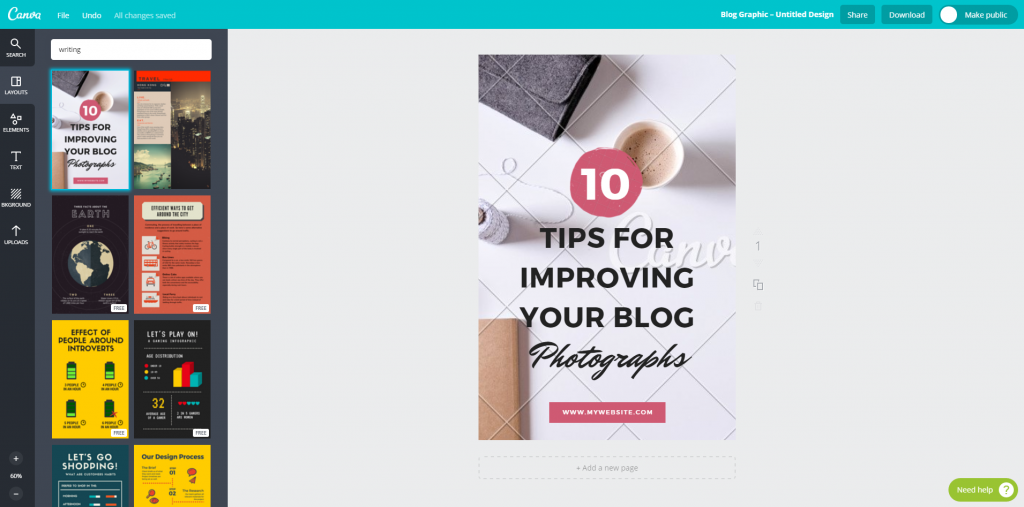
Choose a template: To your left, you’ll see hundreds of templates. You can also search for specific photos, such as “woman at computer” or “writing.”
Templates, photos, typefaces, and other elements are clearly labeled whether they are free or premium.
Each template is completely customizable. You can change the pictures, colors and fonts to meet your client’s brand standards.
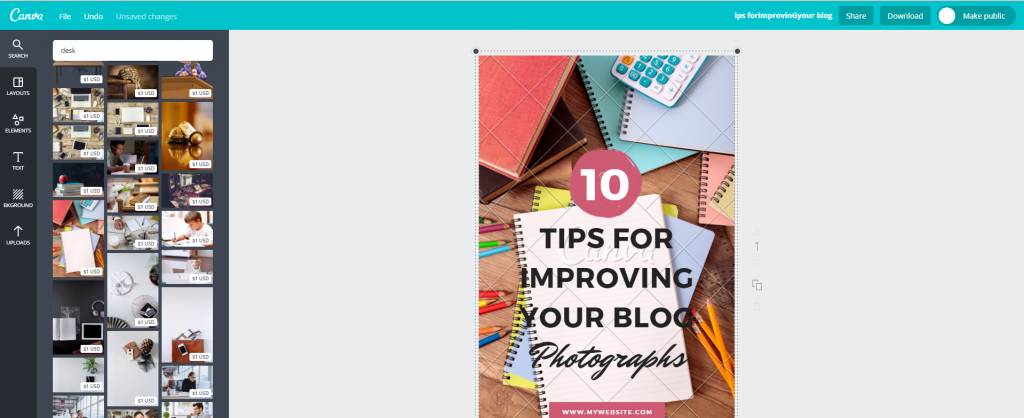
Customize your image: Once you’ve chosen your template, you can change out the images by simply searching for an appropriate image and dragging it over to your workspace.
If you change images, it will not affect the text or other elements, it will only replace the background. In this case, I searched for “desk” and selected a more colorful image as a backdrop.
Once you’ve dragged the picture over, you’ll notice that premium images will have a watermark over them – once you have completed and purchased the design, the watermark will be removed.
Reposition elements: To change the positioning of items, simply hover your mouse over each element-the circle, text lines, or the box-and hold down your mouse to move the items.
For this image, I wanted to move it up so it was clearer on the new background.
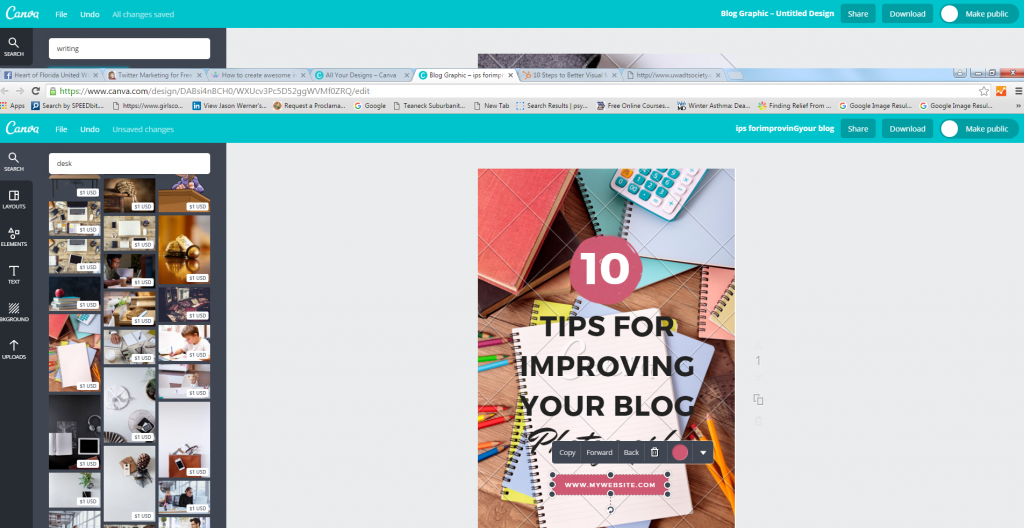
Recolor if necessary: If you don’t like the colors in the template, just click on the individual elements. A circle will appear on the toolbar that appears. If you click on the circle, you can choose another color. I felt like the pink in this image got lost with this background, so I switched the color to teal.
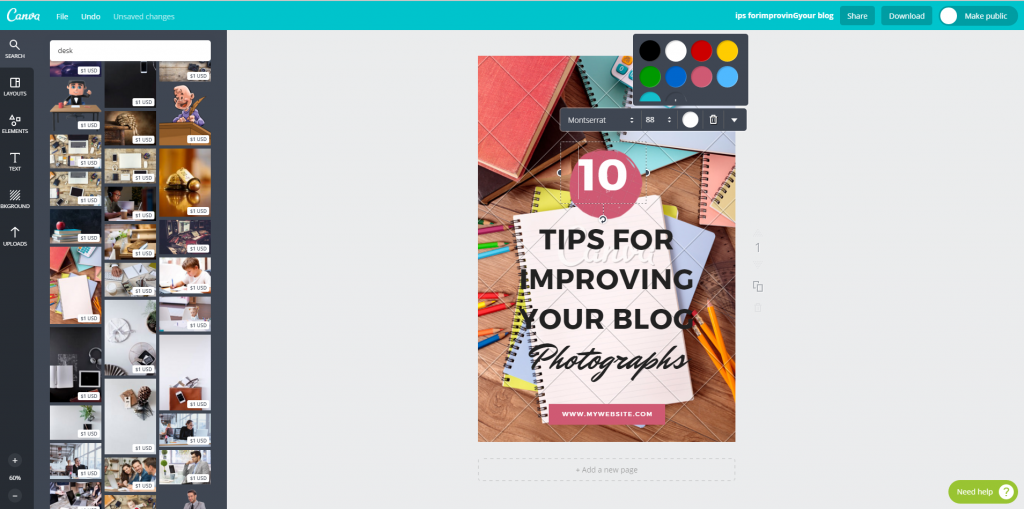
Edit your text: Once the colors are updated, you can change the text to reflect the contents of your blog post or article. Simply click on the text line you would like to edit, delete the current text and type your title in.
Download your image: Once you’re happy with how your image looks, click on “download” at the top right. You can choose whether it should be optimized for print or web use.
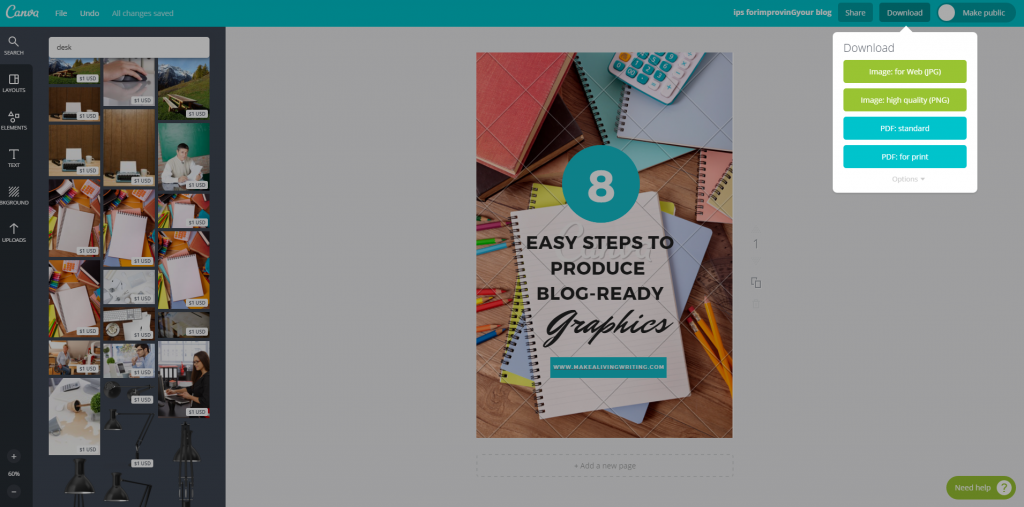
Purchase premium elements: Once you click download, if you have used any premium elements, a pop-up will appear notifying you of the cost and a prompt to enter your payment information. Once you complete the form, your image will immediately download and you can use your image as needed.

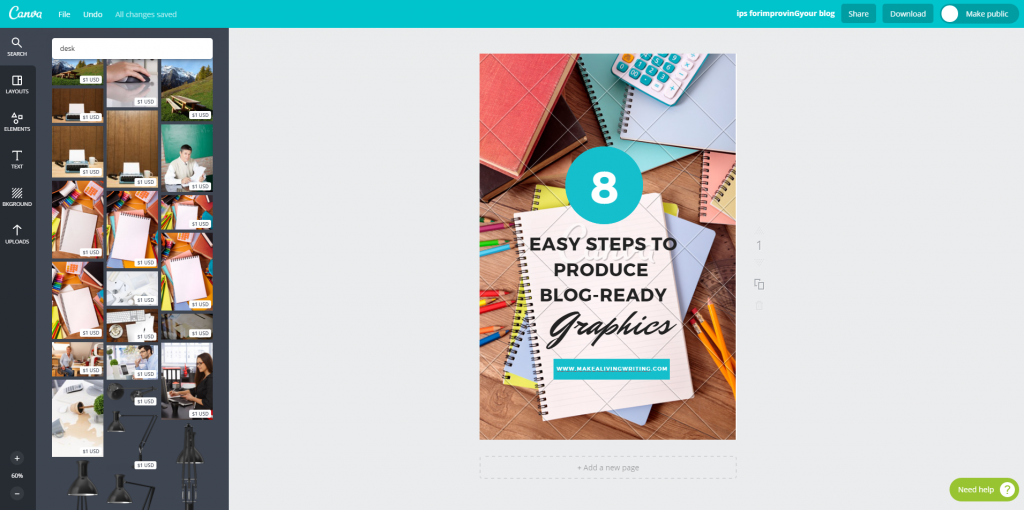
This is how the final image looks:
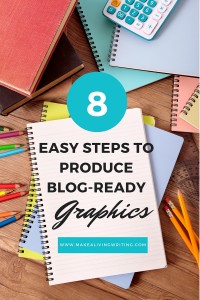
The new image is vibrant, professional, and can work alongside a blog post as well as on social media.
I now include custom images with articles for an additional $50. It gives my clients visual content they can use on their platforms without having to find another freelancer – so most are thrilled when I let them know I offer this service. This has been a great option to include while pitching to help me stand out from other writers.
What tools help you increasing your income? Tell us in the comments below.
Kat Tretina is a freelance writer in Orlando, FL specializing in personal finance and healthcare.